Feature · Stripe
See Stripe Revenue by Traffic Source, Step by Step
Connect Stripe to DataFair and see which channels, pages and campaigns bring paying customers. Covers Payment Links, Checkout Sessions and subscriptions.
· 3 min read

This guide connects Stripe to DataFair so every payment shows up next to the channel, referrer, campaign and page that led to it. It takes about ten minutes. If you want the background first, read how revenue attribution works.
1. Add the DataFair script
Add your website in DataFair and paste the script into every page, usually in your layout's <head>:
<script defer data-website-id="YOUR_WEBSITE_ID" src="https://datafair.dev/js/script.js"></script>Open your site once so DataFair sees a real visit and verifies the install.
2. Add the Stripe webhook
- In DataFair, open Integrations, pick Stripe and click Get webhook URL.
- In Stripe, go to Developers → Webhooks and add an endpoint with that URL.
- Select these events:
checkout.session.completed,checkout.session.async_payment_succeeded,invoice.paid,invoice.payment_failed,charge.refunded,charge.dispute.createdandcustomer.subscription.deleted. - Copy Stripe's signing secret into DataFair and click Save and finish.
Test mode and live mode have separate webhooks and secrets. Connect the one you sell in.
3. Pass the visitor to checkout
This step decides how many payments get a source.
Stripe Payment Links: nothing to do. The DataFair script tags buy.stripe.com links on your pages with the visitor's id.
Checkout Sessions you create on your server: read the ids in the browser and send them with the request that creates the session:
const ids = window.datafair.attribution(); // { df_visitor_id, df_session_id }
await fetch('/api/checkout', { method: 'POST', body: JSON.stringify(ids) });
Then put them in the session's metadata:
const session = await stripe.checkout.sessions.create({
  mode: 'subscription',
  line_items: [{ price: 'price_123', quantity: 1 }],
  success_url: 'https://example.com/thanks',
  metadata: { df_visitor_id: body.df_visitor_id, df_session_id: body.df_session_id },
});
If one Stripe account sells for several websites, also add df_site_id with the website's id, so each payment lands on the right site.
Payments with no id fall back to weaker matches, such as the same customer's email, and anything left over is shown as unattributed.
4. Read your Stripe revenue by source
Within minutes of the next payment, the dashboard shows revenue next to each channel, referrer, campaign, page and country.
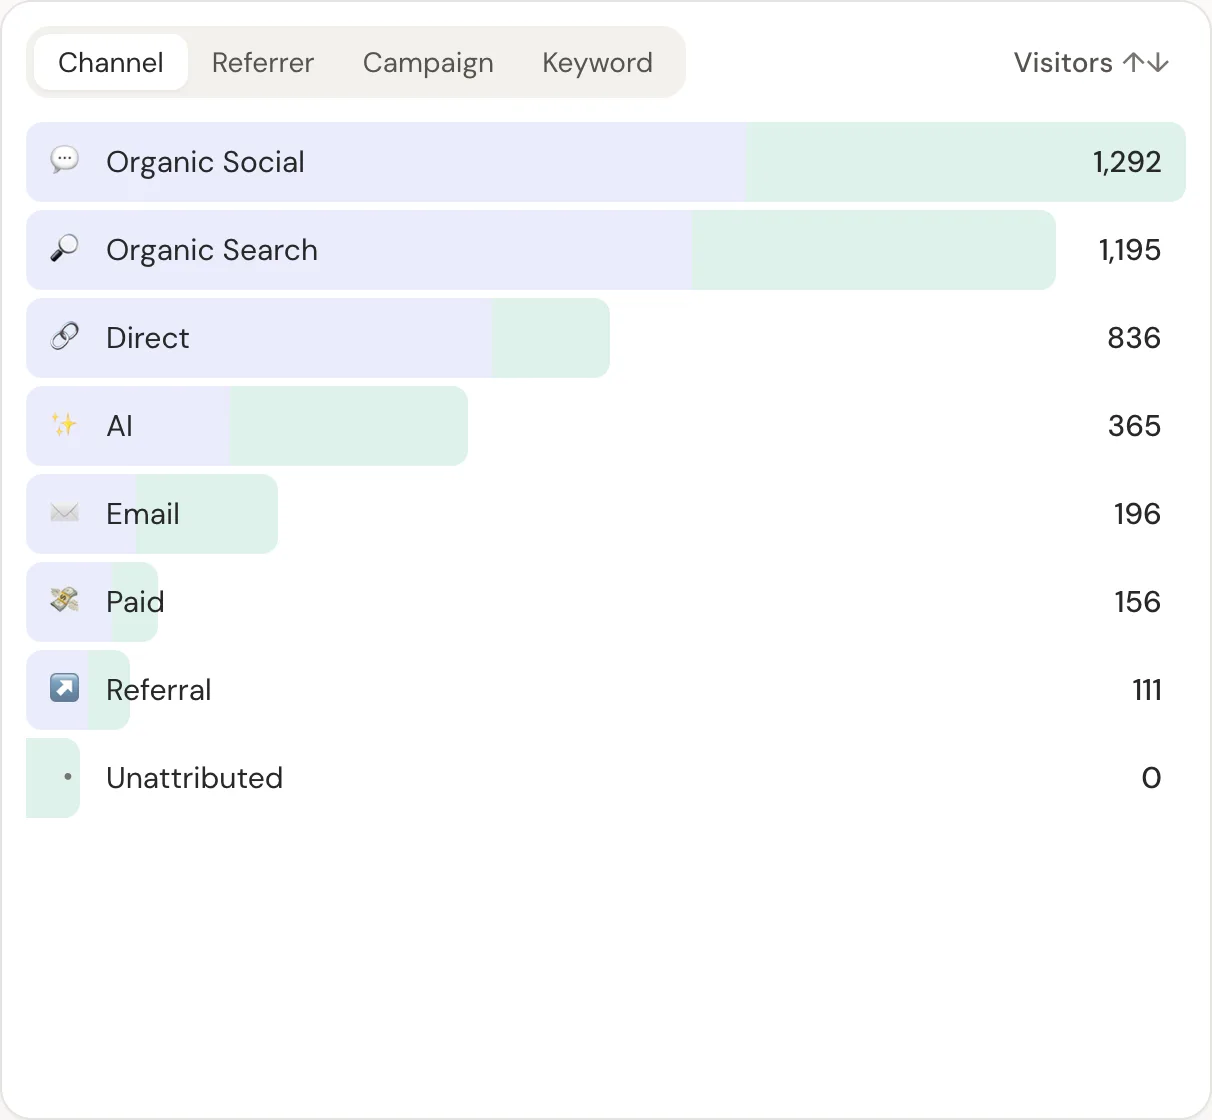
- Sort by revenue to see which sources carry the business.
- Check revenue per visitor to compare small and big channels fairly.
- Open Recurring revenue to see MRR and churn by source, built from
invoice.paidrenewals.
Refunds and disputes
charge.refunded lowers the revenue credited to the original source. charge.dispute.created marks the payment as disputed. Your charts stay honest without manual fixes.
Related guide: Stripe revenue attribution.
Questions
- Do I need a Stripe API key?
- No. DataFair only receives the webhook events you select, verified with the signing secret.
- Will past Stripe payments be attributed?
- No. Attribution needs the visit that led to the payment, so revenue starts from when you connect. Historical import from providers isn't available yet.
- What about Stripe Payment Links with my own UTM parameters?
- Keep them. DataFair reads UTM parameters on your pages, and its own tag on the link carries the visitor id to the payment.